
15 min read · Pillar Guide
Tahoe and Truckee exteriors face one of the harshest combinations in California: heavy sustained snow load, deep freeze-thaw cycling, ice damming, intense altitude UV, and serious wildfire exposure — often all on one wall. Weatherproofing a mountain home is almost entirely a detailing discipline, and the snow strategy and fire strategy have to be designed together, not traded against each other.
The Tahoe climate stack, precisely
An alpine exterior at ~6,000+ ft contends with multi-foot snow load against the wall, dozens of freeze-thaw cycles a season, meltwater and ice at every horizontal interface, very high UV that ages finishes fast, and forest-embedded wildfire exposure. Each of these defeats a different shortcut, which is why mountain detailing is unforgiving.
Snow and melt management
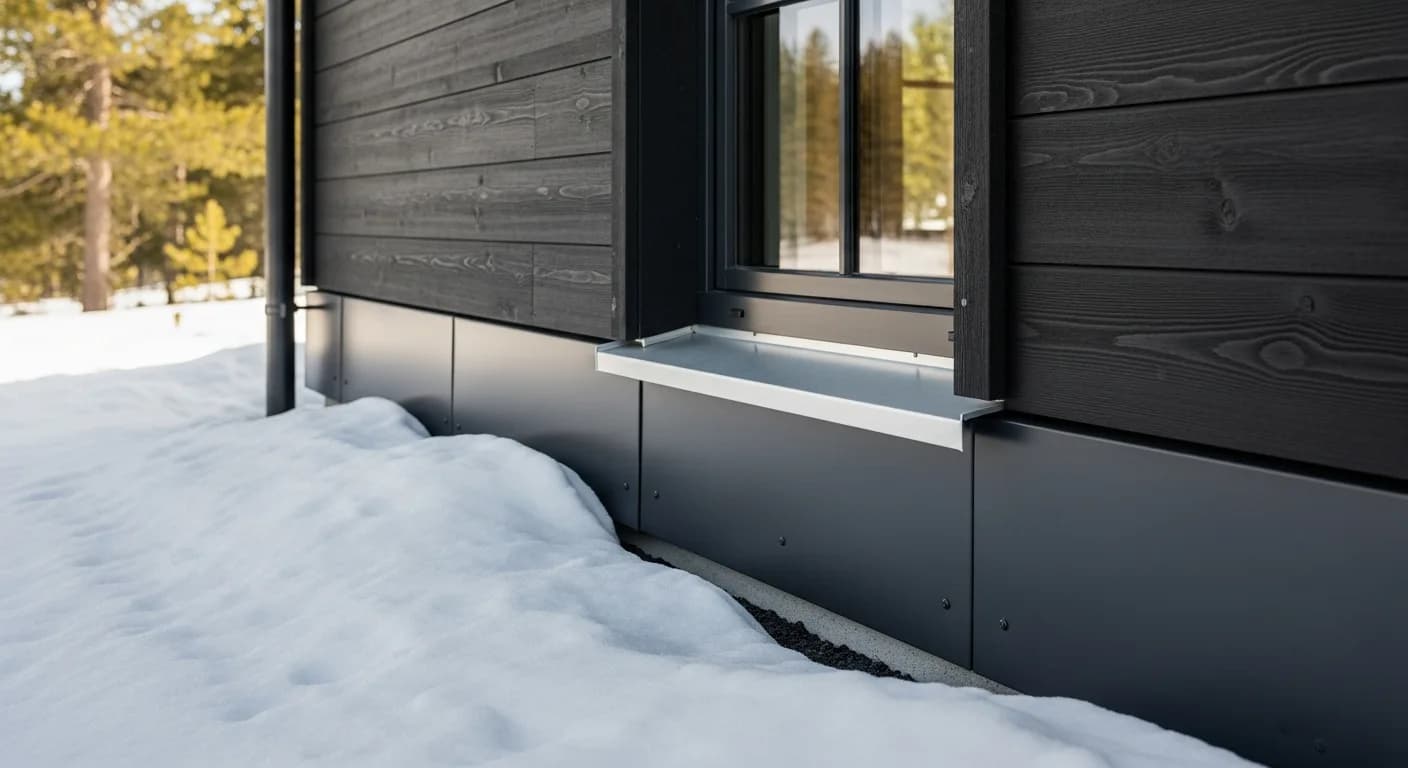
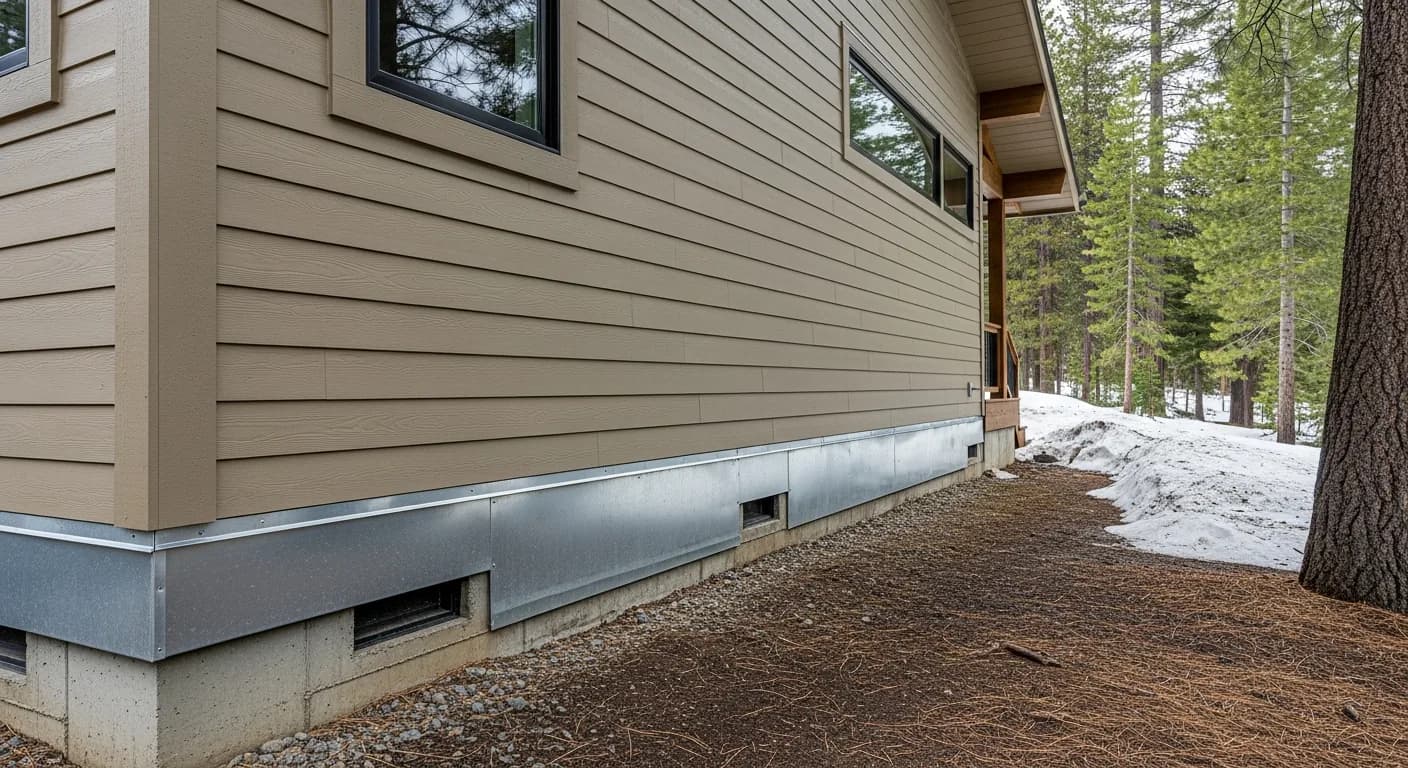
Generous ground and roof-edge clearances keep the bottom courses out of the snowpack, snow-aware flashing sheds meltwater away from joints, and a continuous, back-ventilated drainage plane lets any intrusion drain and dry. The most common mountain failure we find is cladding buried in snowpack with no clearance — it wicks and rots from the base up.
Ice damming and the roof-wall junction
Ice dams force meltwater backward under roofing and into the wall at the eave-wall junction. Correct kickout and step flashing, drainage-plane continuity behind trim, and hardened, screened venting at that junction are essential — it is the single highest-risk detail on a Tahoe home.
Freeze-thaw durability
Materials and fasteners must tolerate repeated freeze-thaw without cracking, spalling, or backing out. Fiber cement detailed to mountain-grade clearances and corrosion-tolerant fastening performs well; fragile or moisture-absorbing materials and field-painted wood do not survive this cycling long.
Altitude UV and finish life
Thin mountain air means stronger UV. Field paint chalks and fails fast at altitude; factory-baked finishes (e.g., high-UV ColorPlus-type color) hold up far better and matter more here than in the valley because re-access for repainting is logistically hard and seasonally limited.
Fire and snow must coexist
Tahoe is genuine forested WUI terrain. Non-combustible Class A cladding, hardened eaves/soffits/vents, ember-resistant deck and ground transitions belong in the same spec as the snow strategy — and neither may compromise the other. We design one envelope that is simultaneously snow-tight and ember-resistant.
Decks, ground transitions, and outbuildings
On mountain lots the deck-to-wall junction and ground transition are both a snow/melt trap and an ember trap. Non-combustible, well-flashed, clearance-correct detailing there protects against both hazards at once; the hardened approach should extend to attached outbuildings.
Seasonal access and project planning
Heavy winter constrains the work window and site access. We plan Tahoe scope and timing realistically around the season rather than promising valley-style scheduling — honest sequencing prevents a half-open wall going into a storm.
It's the system, not just the board
As across every guide here: in the mountains the clearances, flashing, drainage plane, and fire detailing behind the cladding determine survival far more than the board itself. Good fiber cement over an under-detailed alpine assembly still fails.
Condensation and the warm-wall problem
Tahoe's biggest hidden exterior risk isn't the snow you can see — it's the moisture you can't. A heated mountain home pushes warm, humid interior air toward a wall whose outer face is far below freezing, and where that warm air meets the cold sheathing, water condenses inside the assembly. Over winters, that trapped moisture rots framing from the inside out on walls that look perfect from the street. A correct Tahoe exterior is built to dry: a continuous weather-resistive barrier, a drainage and ventilation gap behind the cladding, and air-sealing detail that keeps interior moisture from migrating into the cold wall in the first place. This is the part of the job a homeowner never sees and the part that decides whether the wall lasts thirty years or fails in ten.
Fasteners, flashing metal, and corrosion at altitude
Snow country is hard on metal, and the small parts decide the outcome. Persistent moisture, snowmelt, and the salt and grit that get tracked up mountain roads attack ordinary fasteners and flashing, so a durable Tahoe re-side specifies corrosion-resistant stainless or heavily coated fasteners rather than the standard galvanized used down the hill. Kickout flashing where the roof meets a wall is non-negotiable here — without it, roof runoff and melt drive straight behind the siding at the exact junction that already sees the most water. Drip edges, head flashing over openings, and generous ground clearance above the snowpack round out the metal detailing. None of it is glamorous, but in Tahoe the flashing schedule is most of the difference between a wall that sheds water and one that collects it.
Fire code, insurance, and documentation in the basin
Much of the Tahoe basin sits in designated wildfire terrain, and a substantial re-side commonly triggers California's WUI-code requirements: Class A non-combustible cladding, enclosed non-combustible eaves, and ember-resistant vents. Beyond code, mountain homeowners face the same hardening insurance market as the rest of fire-exposed California, and a documented non-combustible exterior is increasingly part of staying insurable. The practical move is to treat the weatherproofing and the fire-hardening as one scope rather than two — the same Class A fiber cement assembly that handles snow and freeze-thaw also satisfies the WUI code — and to keep the documentation (assembly, materials, clearances) that an underwriter can actually credit at renewal. In Tahoe the exterior has to win against both winter and fire, and the good news is that the spec for one largely serves the other.
Rainscreen depth and the back-ventilation gap that actually dries
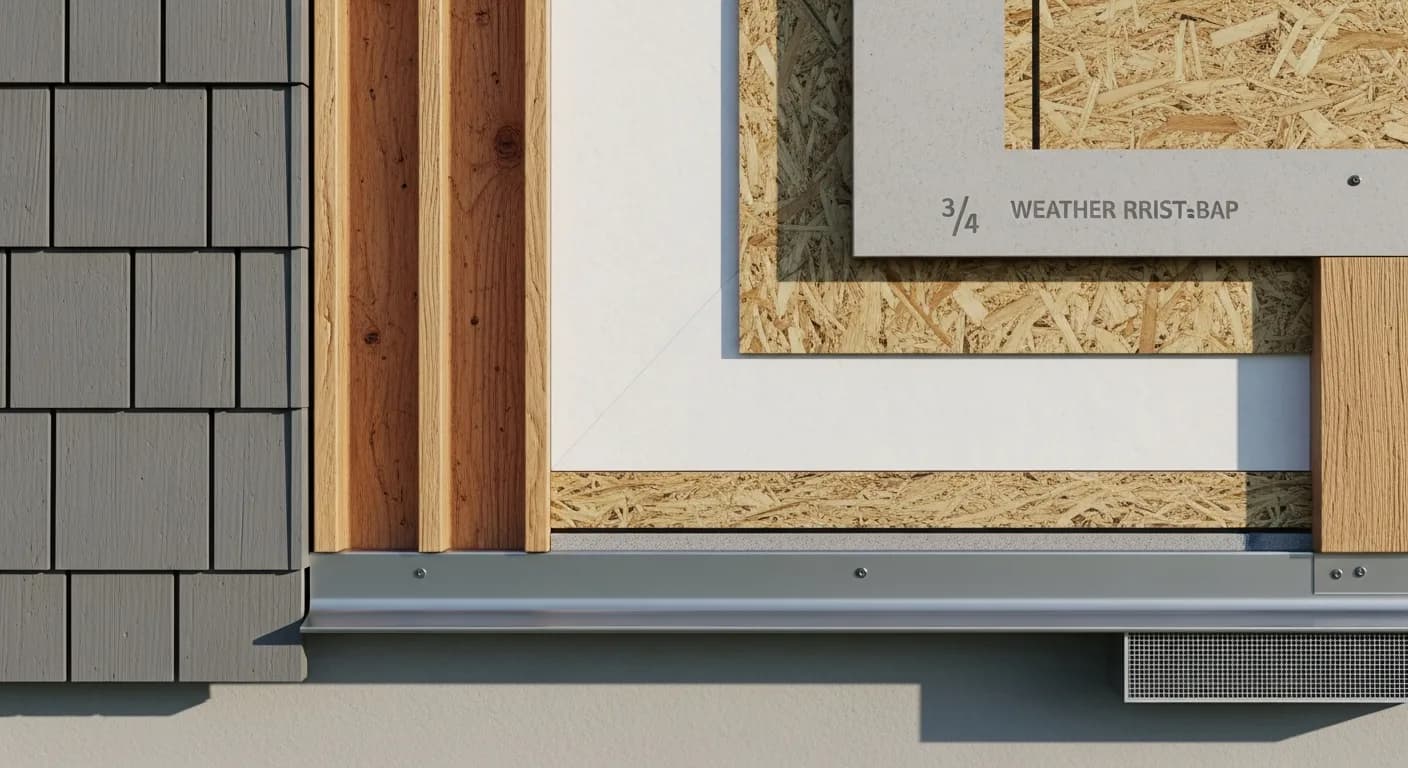
On a Tahoe wall the drainage plane is only half the story; the air gap behind the cladding is what lets a soaked assembly recover between storms. A nominal eighth-inch crinkle-wrap drainage mat is fine in a coastal climate, but at altitude where meltwater sits against the wall for weeks, we prefer a true furred-out rainscreen with a three-quarter-inch ventilated cavity, open top and bottom, so convective airflow can carry moisture out. The bottom of that cavity needs insect screen and a sloped, weep-capable base flashing rather than a closed-off track that traps water. Vertical furring strips should align with the studs and be fastened through the weather-resistive barrier with sealed, gasketed fasteners. Where you run horizontal blocking for trim or fixtures, notch or shim it so the vertical drainage path is never dammed. This matters more for absorptive products than for fiber cement; if you are weighing materials, our overview of fiber cement siding explains why a low-absorption board paired with a vented cavity is the durable mountain combination. The payoff is measurable: a properly vented rainscreen dries an assembly several times faster than a face-sealed one, which is the difference between a wall that sheds a hundred freeze-thaw cycles and one that delaminates at the fasteners in five seasons. Treat the gap as a designed system, not an accidental byproduct of furring.
Window and door integration where most mountain leaks begin
Penetrations are where alpine weatherproofing is won or lost, because every window and door interrupts the drainage plane and adds a horizontal sill that snow and ice love to sit on. The sequence matters as much as the products. We pan-flash every sill with a sloped, back-dammed pan that directs any intrusion outward onto the weather-resistive barrier, never inward to the rough sill. Jamb flashing laps over the pan, head flashing laps over the jambs, and the WRB shingles over the head flashing so gravity always carries water down and out. Sealant goes on the head and jambs but the sill stays open to drain. For deep snow exposure, we favor units with proven thermal performance so the interior glass edge stays warm enough to avoid condensation; look for ENERGY STAR northern-climate ratings rather than generic specs. Extension jambs and exterior trim should be detailed with a continuous back-vented air gap matching the field cladding, and the trim head needs its own drip cap. A frequent mistake we correct on existing Truckee homes is reverse-lapped housewrap above windows, which funnels meltwater behind the unit and rots the rough opening invisibly for years. If you are scoping a remodel, the window and trim details belong in the same conversation as the cladding, which is why we walk both during an on-site free estimate.
Building the snow-and-fire detail at the same wall plane
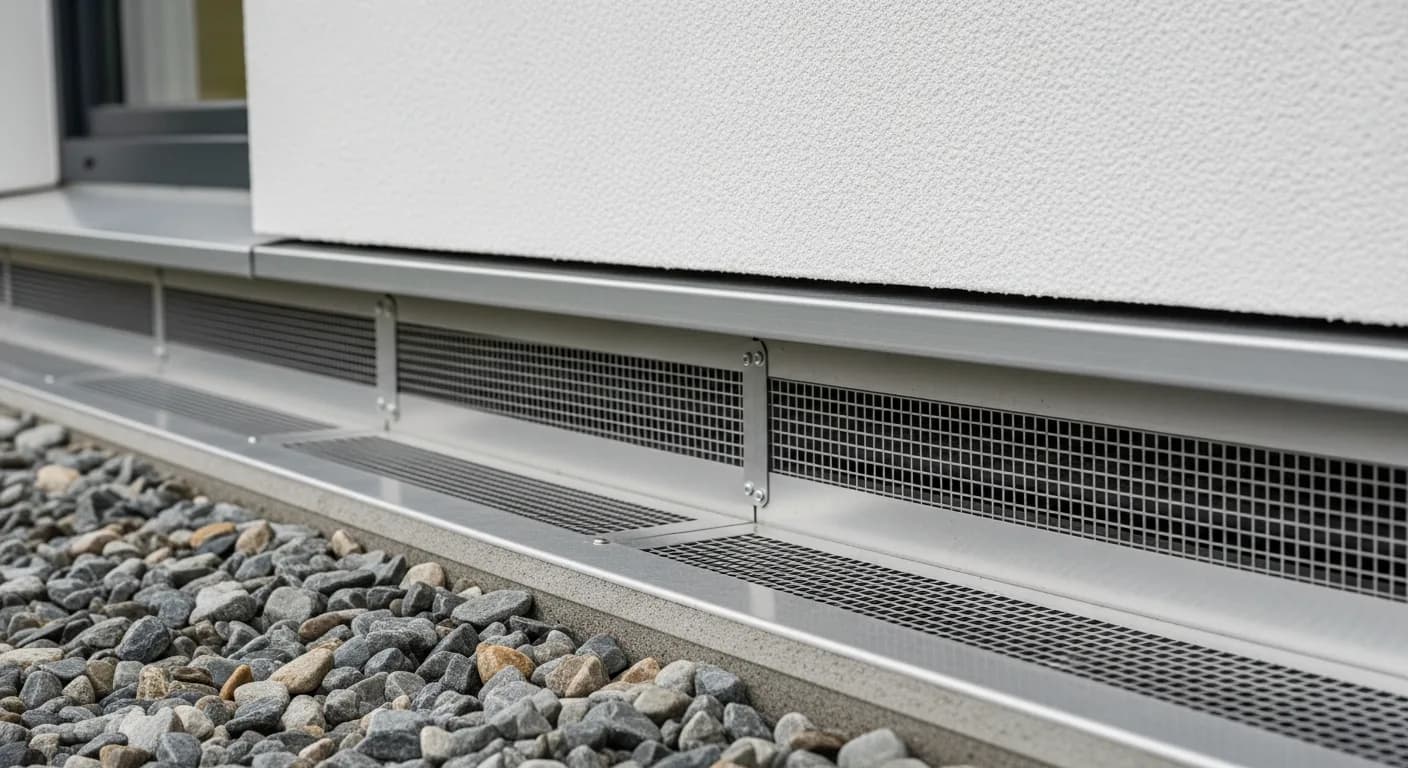
The hardest mountain problem is that snow management wants generous clearances and drainage gaps while wildfire hardening wants those same gaps sealed against ember entry. You cannot solve them separately. The reconciliation is a vented base that uses ember-resistant components: a rainscreen weep track or vent that meets the airflow requirement while incorporating flame-and-ember-resistant baffles or fine corrosion-resistant mesh that blocks the 1/16-inch to 1/8-inch ember path. At the roof-wall junction and any soffit return, the same logic applies; ventilation must continue, but through listed vents rather than open slots. California's wildland-urban interface rules drive these choices, and the current hardening guidance from CAL FIRE is the right reference when you specify base trim, vents, and clearances together. Material selection helps the conflict resolve itself: a noncombustible or ignition-resistant cladding lets you keep the ground clearance high without worrying that the exposed lower wall becomes a fire ladder. Decking, fascia, and the first three feet of wall are the priority zone for both snow and embers, so spend the detailing budget there. We document every WUI-compliant assembly we install because insurers in the basin increasingly ask for it; treat that paperwork as part of the build, not an afterthought. When the two strategies are designed on one drawing, they stop competing and start reinforcing each other.
What mountain detailing costs and where the money goes
Weatherproofing a Tahoe exterior costs more per square foot than a valley project, and it helps to understand why before you compare bids. The premium is not the cladding itself; it is the layered detailing: rainscreen furring, snow-rated base and head flashings in heavier-gauge metal, pan-flashed openings, WUI-listed vents, and the extra labor that careful lapping and sequencing demand. Access and a compressed building season add to it as well, since crews lose weeks to weather and stage materials around snow. For realistic ranges across California exterior work, our siding cost guide breaks down material and labor tiers, and the national Remodeling Cost vs. Value report is a useful sanity check on resale return for fiber cement projects. When you read a Tahoe bid, look for the line items that signal mountain-grade work rather than a flat per-foot number: explicit rainscreen depth, flashing gauge, opening pan details, and the WUI vent product being installed. A bid that omits those details is usually pricing a valley assembly that will not survive the basin, and the gap shows up not in year one but in the first hard freeze-thaw winter. Spend the detailing budget where the climate concentrates its attack: the base of the wall, every horizontal interface, and the openings. Skimping on the membrane and flashing to afford a fancier board is the classic mountain mistake, because the board is rarely what fails. Ask any prospective contractor to walk you through the snow-and-fire base detail specifically; the clarity of that answer tells you more about a Tahoe bid than the bottom-line price does.
Tahoe exterior stressors and the response
| Stressor | Risk if ignored | Assembly response |
|---|---|---|
| Deep snow load | Wall/clearance damage, wicking | Snow-aware ground clearances, robust flashing |
| Freeze-thaw | Cracking, finish failure | Freeze-tolerant detailing, factory finish |
| Altitude UV | Rapid field-paint fade | Factory ColorPlus over field paint |
| Forest fire (WUI) | Ignition via embers | Class A board + hardened eaves/vents |
| Absentee maintenance | Unseen failures worsen | Low-maintenance, fail-safe envelope |
Key takeaways
- Mountain weatherproofing is a detailing discipline — clearances and flashing first
- The eave-wall junction and ice damming are the highest-risk Tahoe details
- Freeze-thaw rules out fragile materials, field paint, and shortcuts
- Altitude UV makes factory-baked finishes far more important than in the valley
- Tahoe is real WUI — fire hardening must be in the same spec as snow
- Decks and ground transitions are both snow traps and ember traps
- Plan scope and timing around the winter season honestly
- The assembly behind the board determines survival in the mountains
FAQ
Quick Answers
Fiber cement detailed to mountain-grade clearances and snow-aware flashing over a back-ventilated drainage plane — it tolerates freeze-thaw and also satisfies the fire requirement. See the linked best-siding-for-Tahoe-snow guide.
Almost always because the bottom courses sit in snowpack with insufficient ground clearance and wick meltwater. It's a clearance-and-flashing failure, not the cladding alone.
Yes — Tahoe is forested WUI terrain. Non-combustible cladding and hardened detailing must be in the same spec as the snow strategy, not chosen instead of it.
Generally — it's combustible in forested terrain and less freeze-thaw-tolerant than mountain-detailed fiber cement. We strongly favor non-combustible assemblies.
Stronger UV at altitude breaks down field paint quickly; factory-baked finishes last much longer and reduce hard, season-limited re-access for repainting.
The eave-wall junction with ice-dam exposure — kickout/step flashing, drainage-plane continuity, and hardened venting there prevent the most damaging failures.
Yes — both, plus the surrounding North and West Shore and foothill mountain communities. Each parcel's snow-and-fire mix is assessed individually.
The season constrains it; we plan and sequence scope so the wall is never left open into a storm, rather than promising valley-style timelines.
Sources
Authoritative references
- ENERGY STAR — Residential Windows, Doors & Skylights
- National Fenestration Rating Council (NFRC) — window performance ratings
- CAL FIRE Ready for Wildfire — home hardening & defensible space
- 2025 California Wildland-Urban Interface Code (Title 24, Part 7) — exterior walls & wall coverings, §504.5
- CAL FIRE — California Department of Forestry and Fire Protection
- Zonda — 2025 Cost vs. Value Report (exterior remodel ROI)
External links to government, code, and manufacturer sources. Sierra Siding is not affiliated with these organizations; references are provided for verification.