
9 min read · Buyer's Guide
Dry rot is the damage you don't see until it's expensive. The name is misleading — it's actually caused by a fungus that needs moisture to grow, and it does its work behind the cladding, in the sheathing and framing where you can't watch it spread. By the time rot is obvious from the outside, it has usually been advancing for months or years. The upside is that the wall almost always gives you warnings first, if you know what to look for. This guide covers 6 signs that rot is developing behind your siding before it becomes visible, what each one means, and why acting early is the single biggest cost-saver in exterior work. When something on this list sounds familiar, dry rot repair and siding repair both start with an honest on-site look.
Why California homes get dry rot in the first place
Rot needs three things: wood, oxygen, and moisture. The first two are a given in any wall, so moisture is the variable you control. In California, the culprits are rarely dramatic — it's fog and marine humidity along the coast and Bay, winter rain driving into joints, lawn sprinklers hitting the bottom of the wall day after day, and trapped condensation behind cladding that can't dry. Add a flashing or caulk gap (see the weather-resistive barrier types behind your siding) and you've built the conditions rot needs. That's why rot clusters at sills, corners, and the base of walls.
1. Soft or spongy spots when you press the wall
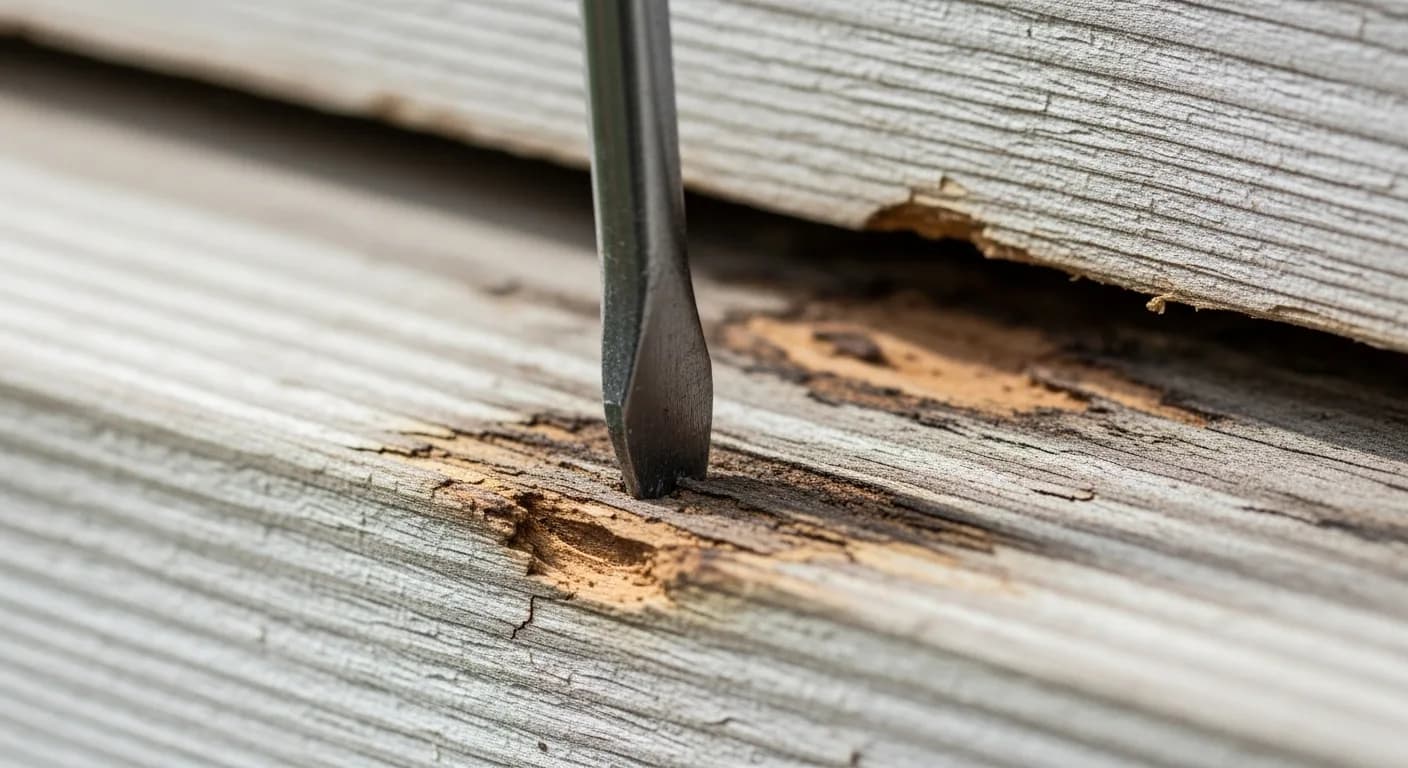
The clearest early sign. Press firmly along the lower courses, around windows, and at corners. Healthy sheathing is solid; rot-softened wood gives or feels spongy. A screwdriver tip will sink into rotted wood with little resistance. Soft spots mean the damage is already structural, not surface — this is the sign that most often turns a small repair into a larger one when ignored.
2. A musty, earthy smell near the wall
Active fungal growth has a distinct damp, earthy, mushroom-like odor. If a particular exterior wall, a closet on an exterior wall, or the area near a window consistently smells musty, that smell is biology — moisture and fungus at work behind the surface. Trust your nose; it often detects rot before your eyes can.
3. Paint that peels, blisters, or discolors in patches
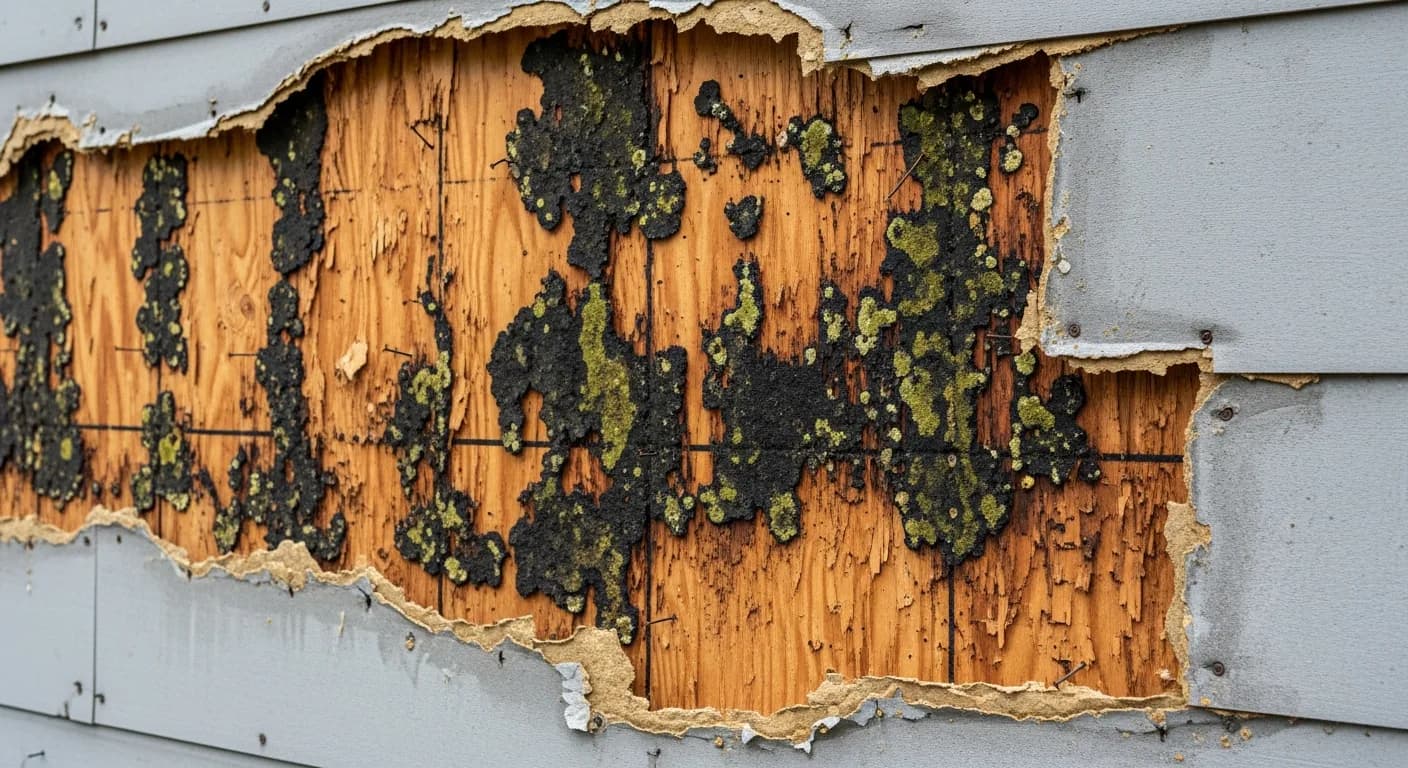
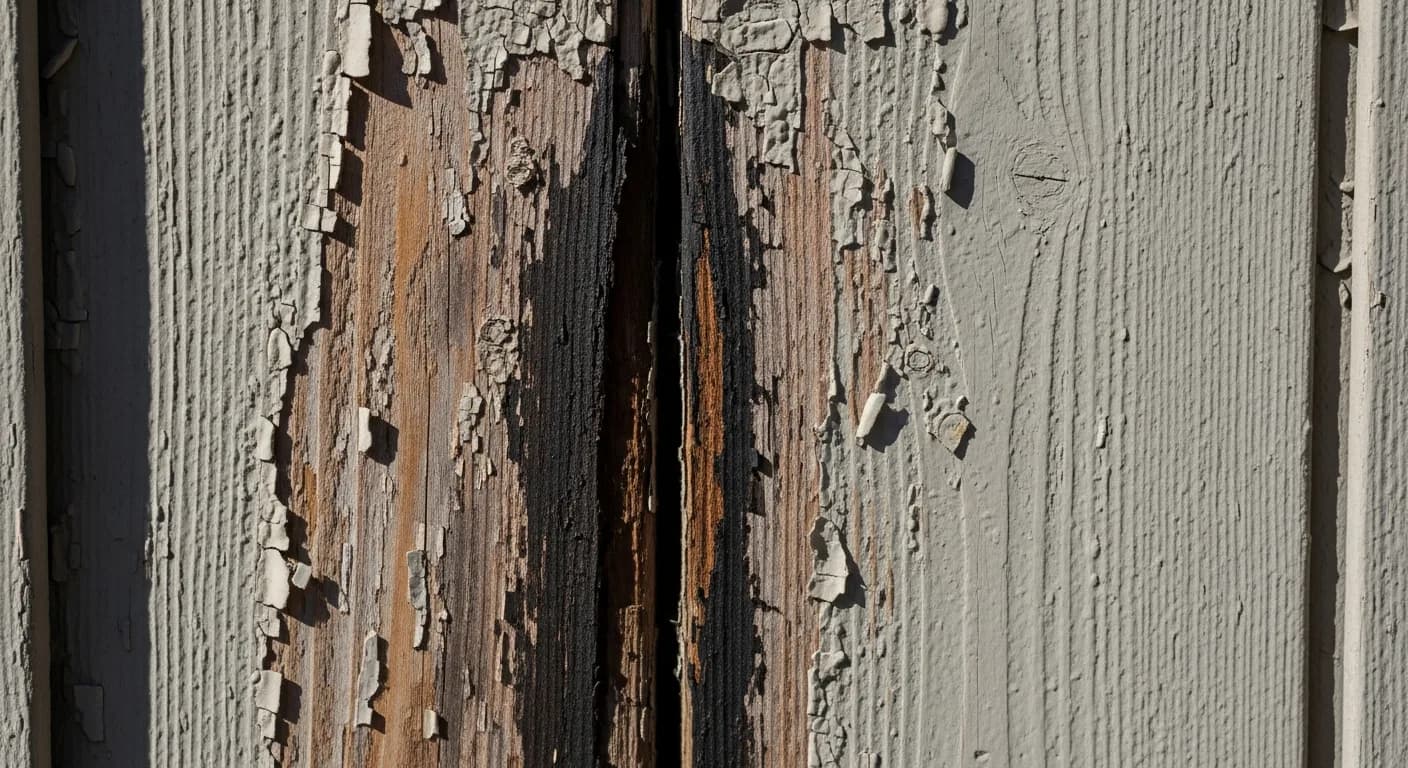
When moisture moves through wood from behind, it pushes the finish off — paint peels, blisters, or shows dark staining in localized patches rather than uniform fading. Localized discoloration low on a wall or below a window is a classic 'something is wet behind here' signal. (Uniform whole-wall fading, by contrast, is usually just UV — see siding warning signs for telling them apart.)
4. Fasteners backing out or trim pulling loose
Rotted wood loses its grip on nails and screws. If you notice nail heads popping, trim boards working loose, or fasteners that no longer hold, the wood they're anchored into may be deteriorating. It's easy to dismiss as 'the house settling,' but localized fastener failure paired with any other sign on this list points to rot.
5. Crumbling, cracked, or darkened wood at the edges
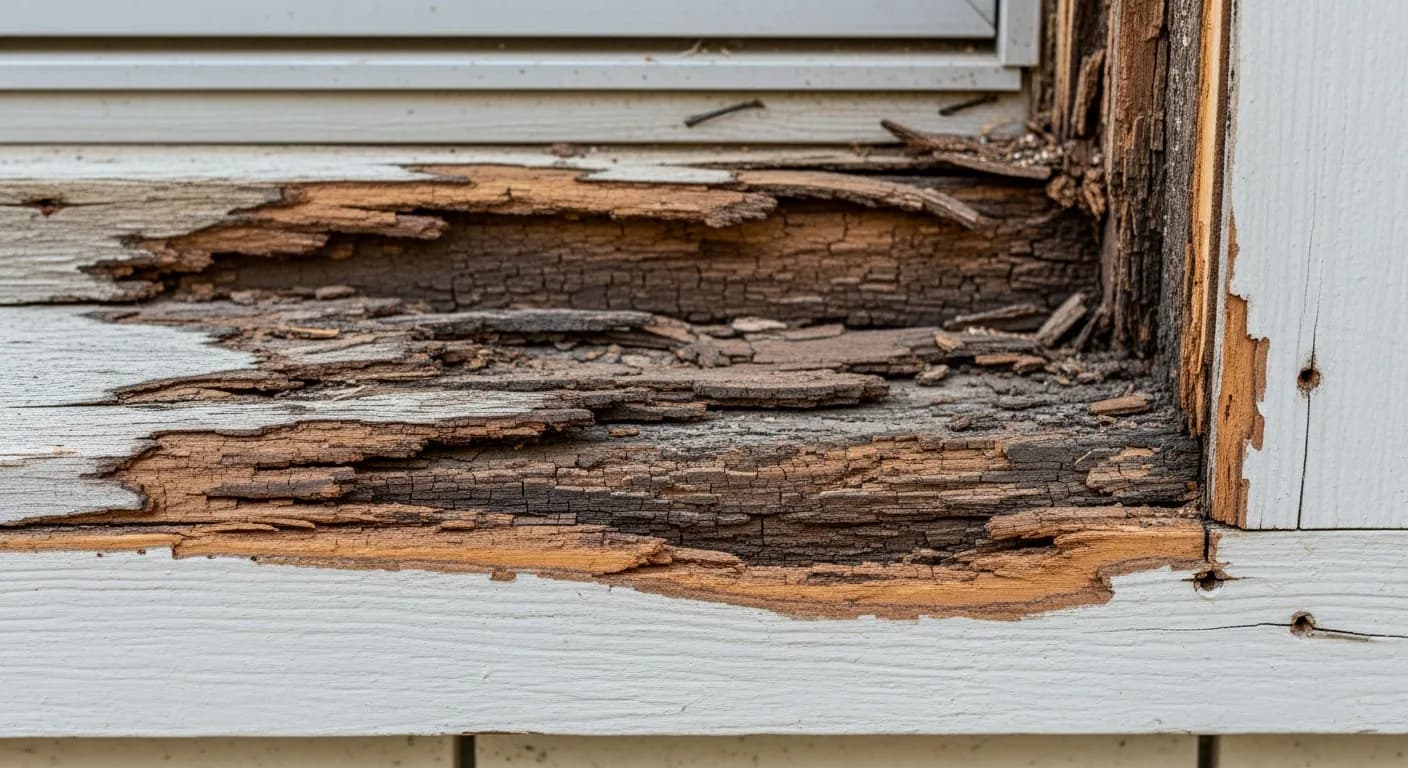
Where you can see exposed wood — at trim ends, the bottom of boards, around penetrations — look for wood that's darkened, cracked in a cube-like pattern, or crumbling to the touch. That cracked, friable texture is advanced fungal decay. If the visible edges look like this, the hidden wood behind the cladding is usually worse.
6. Visible fungal growth or insect activity at the sill
White, stringy fungal strands or fruiting bodies at the base of a wall are unambiguous. So is a sudden interest from carpenter ants or termites — pests are drawn to softened, moist wood, so an insect problem at the wall base often sits on top of a moisture-and-rot problem. Both warrant opening up the area to see the true extent.
Why early action is the whole game
Rot spreads as long as the moisture source remains. A small repair caught at sign #1 might mean replacing a few feet of sheathing and re-detailing the flashing. The same wall left a year or two longer can mean framing repairs, a larger section of siding, and a much bigger bill. Catching it early isn't just tidier — it's the single biggest lever you have on cost. If several of these signs are present, the question shifts from repair toward repair or replace for that wall.
Catch it early, spend less
Dry rot only stops when the moisture feeding it stops, so the best thing you can do is act on the earliest sign rather than wait for it to become obvious. Materials like James Hardie fiber cement are engineered to manage moisture far better than older wood cladding, which is why many California re-sides pair rot repair with a fiber-cement upgrade. If you've found a soft spot or a musty wall, the next step is opening the area to see the true extent — that's where honest dry rot repair and siding repair begin. Request a free assessment and we'll tell you whether it's a small fix or something larger before it costs more.
How moisture gets behind siding in the first place
Dry rot can't start without a moisture source, so the most useful thing a homeowner can do is understand the common entry points. Behind most siding failures is a small, boring detail that went wrong years earlier: a kickout flashing that was never installed where a roof edge meets a wall, a window head flashing that was caulked instead of lapped over the housewrap, or a deck ledger bolted through the cladding without proper sealing. Water finds these gaps, wicks into the sheathing, and stays there because the wall cavity dries slowly. Sprinkler spray that hits the lower courses every morning is another quiet culprit, as is splashback from hardscape that sits too close to the foundation. Even a well-built wall can rot if the grade slopes toward the house or a downspout dumps at the corner. The pattern matters more than any single leak. If you notice a stain or soft spot, look directly above it for the real source, because water travels down and sideways before it shows. When the underlying detail is the problem, replacing a board alone will not stop the rot from returning. A thorough siding repair addresses the flashing and drainage path, not just the visible damage, which is why a real inspection traces the water back to where it entered.
Inspecting trouble spots yourself without making it worse
Before you call anyone, you can do a careful walk-around that tells you a lot. Start at the bottom courses near grade, around every window and door, and at any penetration like a hose bib, dryer vent, or electrical box, since these are where rot concentrates. Press firmly with your thumb; healthy sheathing feels solid, while compromised wood gives slightly or feels cool and damp. A small awl or a flathead screwdriver is the classic probe: if it sinks into the wood with light pressure, you have found active decay. Tap along the wall and listen for a dull, hollow change in tone compared to sound areas. Photograph everything, including the area above each soft spot, so you can show a contractor the full picture. What you should not do is start prying off boards or digging aggressively into suspect wood, because you can tear the weather barrier, spread fungal spores into dry framing, and turn a contained repair into open exposure right before the next rain. If you confirm softness, cover the area loosely and keep sprinklers off it. The Contractors State License Board is also where you can verify that whoever you hire holds an active California license before any wall gets opened up. A measured look beats an aggressive teardown every time.
What changes when one board becomes a wall section
There is a real decision point between repairing a few boards and re-siding an elevation, and rot is usually what tips it. When a contractor opens the wall and finds rot limited to a couple of feet of sheathing with dry, sound framing behind it, the fix is contained: cut back to solid material, replace the sheathing, correct the flashing, and patch the cladding to match. But if probing reveals that the framing studs or the sill plate have softened, or that moisture has tracked several feet along the bottom plate, the scope expands fast because structural members carry load and cannot simply be patched over. At that stage the labor to blend new boards into old, weathered siding often costs nearly as much as doing a full elevation, and the result looks better and performs better when the whole face is done at once. Material choice enters here too: many owners use the opening to switch to a rot-resistant product like fiber cement siding rather than reinstall the same wood that failed. The honest answer only comes after the wall is opened, which is why a same-elevation estimate can swing widely. If you want to understand the ranges before committing, the siding cost guide lays out what drives the numbers in California.
Why California's wet-then-dry climate accelerates the cycle
California's seasonal pattern is unusually hard on walls in a way that surprises people who moved from steadier climates. Through the winter atmospheric-river months, walls take on repeated heavy wetting, and a cavity that cannot drain or breathe holds that moisture against the sheathing. Then the long dry summer arrives, the surface bakes, and homeowners assume any problem has dried out and resolved. It has not. The fungus that drives decay tolerates these swings well; it goes dormant in the dry stretch and reactivates the moment the next rain rewets the wood, so each winter advances the damage a little further while the exterior looks fine. Coastal and foothill homes see this most acutely because marine fog and longer drying lags keep wall cavities damp into spring. Layered on top is wildfire exposure, which pushes many owners toward hardened, non-combustible cladding; the resources from CAL FIRE on home hardening are worth reading if you live in a high-risk zone, since a re-side is the natural moment to address both rot resistance and ember resistance together. The takeaway is that a dry summer is not proof the wall is healthy, and the smartest time to inspect is at the end of the rainy season. If a sign on this page rings true, you can start with an honest look through the free estimate process.
Key takeaways
- Dry rot is fungal decay that needs moisture — and it spreads out of sight behind the cladding
- Soft, spongy spots are the clearest early sign and mean the damage is already structural
- A persistent musty smell is biology — trust it over what your eyes can see
- Localized peeling, staining, and backing-out fasteners point to moisture behind the wall
- Rot clusters at sills, corners, and the base of walls where water collects
- Catching rot early is the single biggest cost-saver — it spreads until the moisture source is fixed
FAQ
Quick Answers
From outside you'll often see localized paint peeling or staining, soft or spongy spots when you press the wall, and darkened or crumbling wood at exposed edges. The worst of it is hidden in the sheathing and framing behind the cladding.
It's urgent rather than instantaneous. Rot keeps spreading as long as moisture reaches the wood, so the longer it waits the more wood is affected — which is exactly why early repair is so much cheaper than late repair.
No. Painting over rotted or moisture-laden wood traps the problem and hides it while it continues to spread. The decayed wood has to be removed and the moisture source corrected first.
A damp, earthy, mushroom-like smell at an exterior wall usually means active fungal growth — moisture is reaching the wood behind the surface. It's one of the earliest detectable signs of rot.
Yes, commonly. Sprinklers that hit the bottom of a wall day after day keep the lowest courses and sheathing damp, which is exactly the condition rot needs. Redirecting spray away from the house is a cheap prevention step.
Only as much as it takes to reach sound wood plus a margin, but the true extent isn't known until the cladding comes off. Catching it early keeps that opening small; waiting tends to enlarge it.
Sources
Authoritative references
- James Hardie — official product & installation resources
- Contractors State License Board (CSLB) — verify a California contractor
External links to government, code, and manufacturer sources. Sierra Siding is not affiliated with these organizations; references are provided for verification.